I know this isn't like most of my entries. I just feel I need to post all I've learned to help out others just starting with their YUDUs. love, kira
Catch the first part, all about emulsion sheets, here.
The Yudu comes with one inkjet transparency. Allow me to explain how this concept works.
Transparencies are slick. Remember teachers using them in school? How they could write on them with those awesome vis-a-vi markers that would wipe off? These are just like those. Except inkjet transparencies have a special coating on one side (or both) that allows slick ink to stick to it. The ink isn’t sticking to the actual transparency -- it’s sticking to the chemical coating.
Because of this sticky stuff, it may get messed up in your printer. It defiantly got the better of mine. If you have one of those smaller ones that takes the paper like an old fax machine, you know, standing up? From my experience, those are the ones that get all gunked up from trying to print. So, like your emulsion sheet, cut the transparency in half before trying to print.
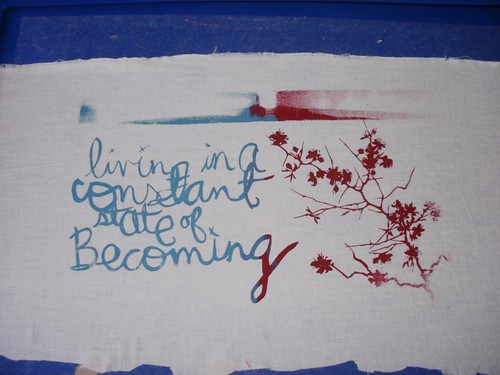
Alternatively, you can draw directly onto the transparency with a black Sharpie. Seriously, this didn’t occur to me until maybe last night, so that’s a month in -- but you can trace something or just draw on the sheet. Just so long as the colored in areas are SOLID BLACK. Anything that isn’t black will not transfer to the screen.
The DVD/CD ROM disk that comes with the machine has some sample images on it if you’d like to play right away. Also, ProvoCraft sells tubes of pre-made transparencies for you to use. However, if you plan to sell anything you print with their images, you can only do so if a. it is a small print run, and b. is not done online. There’s a copy of their Angel Policy on their website if you’d like the full wording; I just thought I’d break it down for you here.
There's a great explanation at the bottom of this page. Read through it to see why you can't really sell anything made with the packaged transparencies.
one of the transparencies created by ProvoCraft for the Yudu
Since you’re just experimenting, stick with either drawing on the transparency or testing your printer with half of one.
Another idea is to use laser transparencies. These don’t have the special coating because of the way laser printers work -- instead of having the ink floating on the page, laser printers have a powder pigment that is burned onto the page. I won’t get technical here, but I will say that using the laser ones gives you stronger blacks and may not be as expensive. How do you use these if you don’t have a laser printer, you ask?
Simple! Print your black image out on a piece of paper. Take said paper to Office Max or whatever supply store you prefer. Buy a transparency (single from the print center or a box from the store), load it up in their black and white copier, and voila! You have a nice, solid black laser transparency to print with. This is a cheap alternative if you find your printer + inkjet transparencies = disaster.
a transpariency I created on the computer and printed with a laser printe
One thing that never occurred to me was the idea that I could trace something onto the transparency. Simply push the lightbulb button on the yudu and place the original picture on the surface, then put the transparency atop that. With a Sharpie, trace what you want to use, and color in the areas you want to print. Simple, right? Just make sure you make a solid block of black; if there's even one tiny bit that isn't colored, it will show up on the final screen. That's how exact and awesome the Yudu is. Seriously. When printed right, you can see the edges of the pixels from an image I burned to a screen. Yeah. That good.
You can also put something down on the glass, such as a cut shape or found object, as long as it's flat enough that you can get the screen and t-shirt platen on it.
Once you have your image on the transparency, you're ready to burn the screen. This is so amazingly easy compared to everything else, I'm just going to direct you to the instructions to do this.
However, when you rinse the screen, work FIRST on the top of the screen. And don't use the scratchy green part on the bottom, where the emulsion is. You're just going to mess things up. Despite the screen being burned, it needs some more time to become completely hardened. Just be gentle and patient. It'll be worth the extra time when you have a nice, perfect screen to print with.
Next week! All about printing. And I've got a LOT to say about that!