
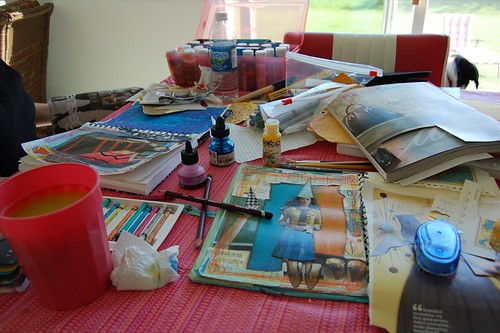

Photos from my “play-date” with Retro Girl. We sat and gabbed and journaled in her wonderfully red retro kitchen, back door open to capture the late summer air as it brushed across the tops of corn stalks and came through the open back door.
Random stuff. The state of the planet, likes, dislikes, other artists we admire, those sorts of things. And journaling. I must admit, I’m not a very good teacher, though I did arrive a bit unprepared. I couldn’t instruct methods, give clear direction, but I could talk, inspire, encourage, and while I spoke and Retro Girl responded, she found herself un-blocked, working subconsciously on her journal page, letting it create itself as she focused on the spoken word.
It’s something I whole-heartedly suggest, working intuitively, not over thinking the scraps or images you’re using while creating the visual base for a journal entry (or the imagery of a wordless entry).
As I’m planning ahead and ahead for future issues of Page by Page, as well as an online class (at Lia’s gentle urging…several times!), I asked Retro Girl what sorts of things someone still finding their way as an art journaler is looking to learn. What is it that those seeking instruction hope to be, well, instructed on?
There were a few things, and I think my gab-fest has fueled a few articles, and several blog entries. Today, I’m going to give you the most basic of basics, how to select a journal.
Some books gloss over this, give you the types of paper in a language you don’t completely understand, brush over binding styles, and move on. At that point, you’re supposed to have intuitively found your journal and are eagerly waiting to get started.
Those who know me know my…indecisive past. I have a drawer full of started journals that, after just a few entries, were abandoned for a variety of reasons – paper, size, binding. Let my years of experimentation benefit you; here’s the skinny on journal choices.
Paper:
There are tons of papers out there. Thick. Thin. Every color of the rainbow. But what does it all mean?
Lb/gsm – this is the “weight” of the paper. The higher the number, the thicker the paper. For example, regular white paper you have in your printer is around 20-26lb. That cardstock you have is about 60-90lb. This includes scrapbooking cardstock, by the way.
When you look at the papers in the sketchbook aisle at your local art store, there’s a whole new set of vocabulary words.
Paper there can go up to 140lb! This is usually reserved for the thicker watercolor papers; this heavy stock can take a lot of what altered artists throw at it, retain the paint well, and doesn’t fall apart after a few good scrubbings.
So, the higher the weight, the thicker the paper. You can have a perfectly good journal made with printer paper, granted you gesso the pages first. Adding gesso thickens and adds strength, but it’s not a fix-all. I recommend using at least a 90lb cardstock for a journal, as it is strong enough to handle what you throw, but isn’t overly expensive.
gsm is the European measurement.
Press – this usually only applies to watercolor paper. Basically, cold press means rougher, textured, toothed. Hot press is a smooth, flat surface.
Calendared – You probably won’t see this a lot, but it’s worth mentioning for any printing you’ll be doing. If a paper is Calendared, it means it doesn’t let inks bleed. Your photo paper’s calendared. Watercolor paper isn’t; it’s made to absorb a lot, and inevitably bleeds.
Binding:
Sewn, or Case Bound – you can tell one of these by looking at the top of the spine, where the paper meets it. Hardcover novels are sewn, as well as Moleskines. These have signatures, groupings of paper that are folded and sewn together with the others. These bindings lay flat when opened, and are the best for journal/art work.
Glue Bound – these are cheaper, but not better. The spine is a bunch of pages simply glued together and then glued to the spine. These WON’T lie flat unless you crack the spine. Think of your paperback books…you crack the spine too much, pages begin falling out. I DON’T recommend using these!
Spiral, or Wire Bound – pretty self-explanatory. Used for notebooks and art pads, as it’s the best for serious art work. I like these only because I can find my own paper and bind it together.
Note – If you bind your own journal, you need paper that’s TWICE as wide as your target width.
Size:
Just some general notes on size. This is a personal thing, and I think it comes down to preference. I’ve used all sorts of sizes, and for various reasons. I carry my journal with me everywhere, so I don’t use something that’s too big. But small journals don’t give you much room to work with.
I keep a larger journal at home for when I want to use larger images, etc. My main journal is the size of a composition book; I’ve found this to be the perfect one!
Hopefully, some of these notes will help you the next time you go looking for, or making a journal. The best way is to use your sense of touch – touch a paper, see how it feels under your fingers. Smooth, rough, what does your heart say? Smooth works for writing, rough for cost and texture. Sit down, think about what you’ll be using your journal for, about your style and goals and budget, and go from there.

My current journal is a wire-bound collection of paper – 18 sheets of children’s watercolor paper (advertised as perfect for markers, poster paint, and watercolors) and another 15 of 90lb white cardstock (for notes, drawings, and such). Its covers are manila folders – 140lb paper in manila. The cover is really a fabric one with book boards in it to give it a more…hardbound feel. The entire thing is cut down to a little under a composition book’s size. Total cost? $10.
Next week, I’ll post my ultimate supply list – and don’t think it’s like all the others you’ve read and seen; this one’s dictated by cost and experience, and has some wacky stuff on it!